Hiking
One of the Best Gadgets for Backpacking: A Review of FlipFuel
August 23, 2022
Have you ever found yourself with multiple half empty fuel canisters? Or have you been frustrated that the smaller fuel canisters for backpacking trips are more expensive? FlipFuel is the product you didn’t know you needed!
FlipFuel allows you to consolidate half empty fuel canisters and recycle the empty ones. This is a great way to be more sustainable and save money for your next backpacking or camping trip.
Full disclaimer – This is a sponsored blog post by FlipFuel. As always, my opinions are unbiased and my own. Thank you for your support!

First Impressions of FlipFuel:
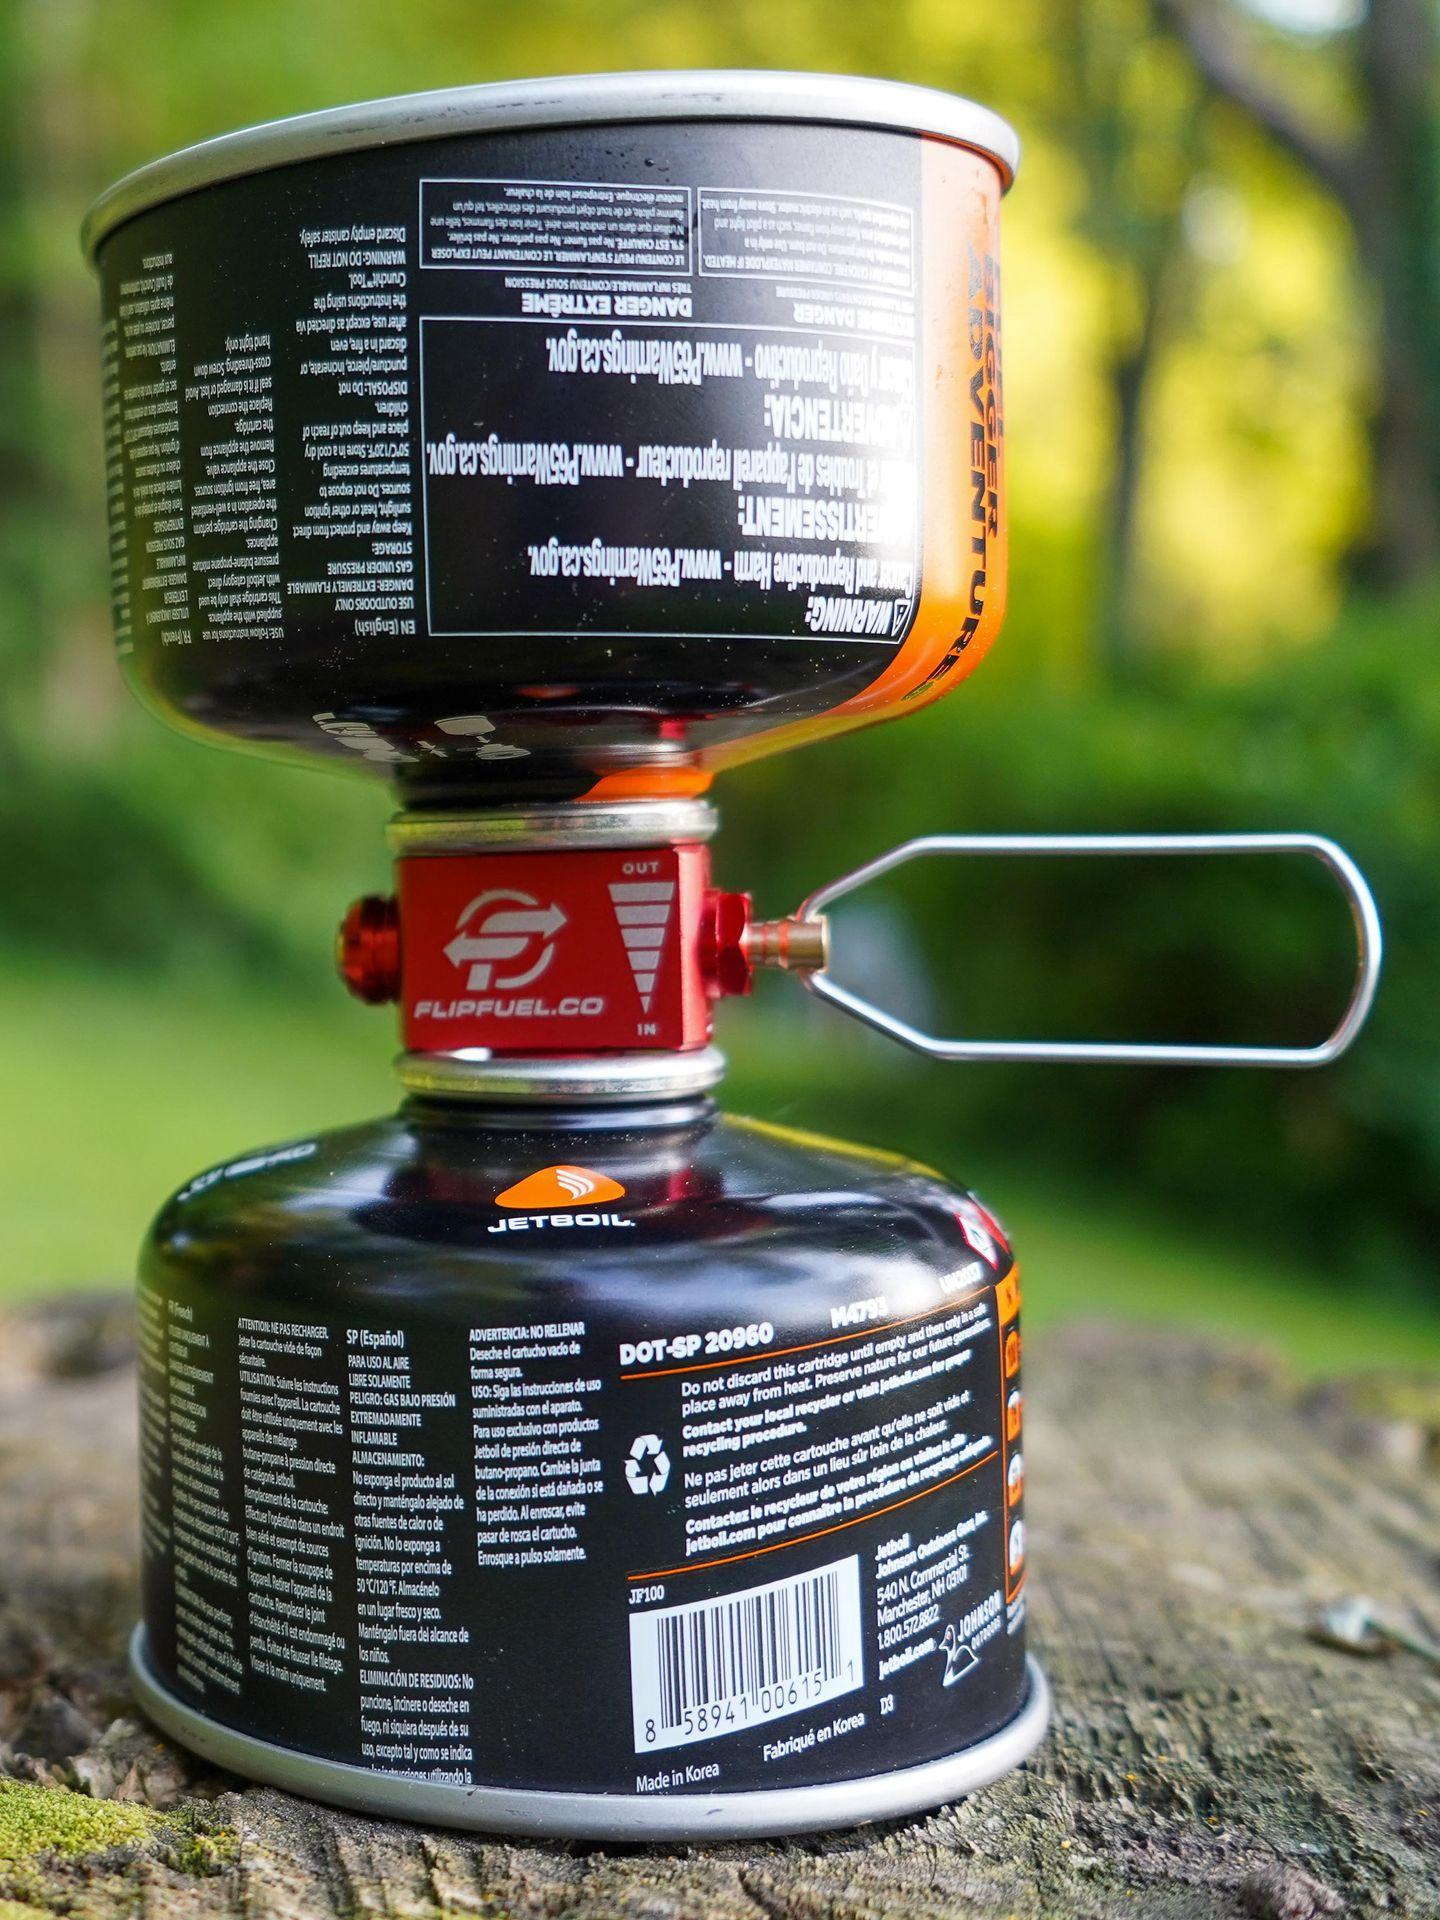
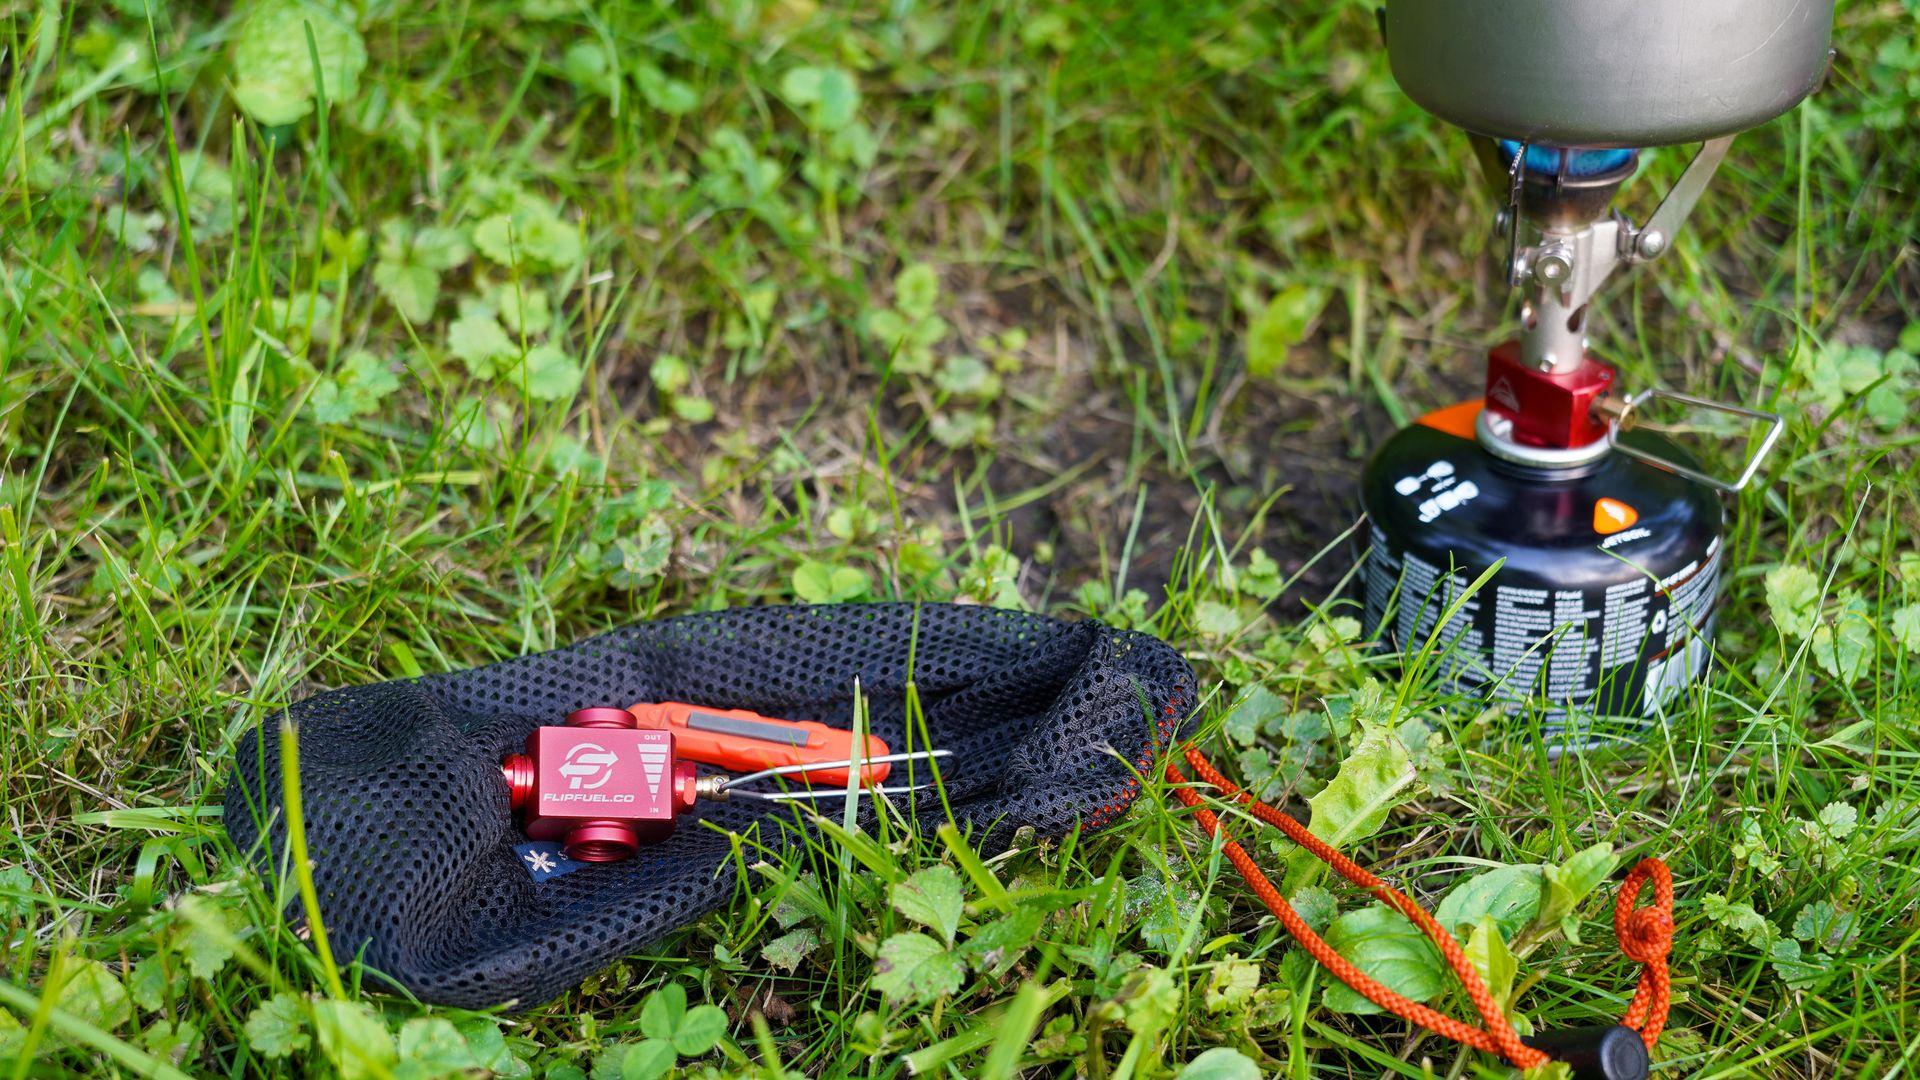
- The device is small, about an inch wide, and very lightweight.
- There are instructions included on how to use the device.
- FlipFuel is very easy to use.
When To Use FlipFuel:
Use FlipFuel before heading out or during your next backpacking trip!
The key to the fuel transferring from one can to the other? You will need to have a slight temperature difference between the two fuel cans.
If preparing for your backpacking trip while at home, one canister can be placed in the freezer briefly. The other canister can be placed in a sunny spot.
If you're transferring fuel during your backpacking trip, you can place this canister in the shade of your backpack instead of using a freezer.
The goal of FlipFuel is to consolidate fuel canisters so you don’t have to pack a half-empty can.
What FlipFuel can be used with:
Isobutane fuel canisters that include the brands MSR, Jetboil, Snow Peak, and more.
It is recommended to transfer fuel between the same brands. These fuel canisters can be canisters of different sizes. (Like from an 8oz to a 4oz)
How To Use FlipFuel:
Start by placing the receiving canister in the freezer (or shade of your backpack) and the sending canister in the sun. The temperature difference is key to helping the fuel move from one can to the other.
Keep them in the freezer (or shady spot) and sun for about 5 minutes. (Note: I brought my two cans outdoors for the next step: connecting the two canisters.)
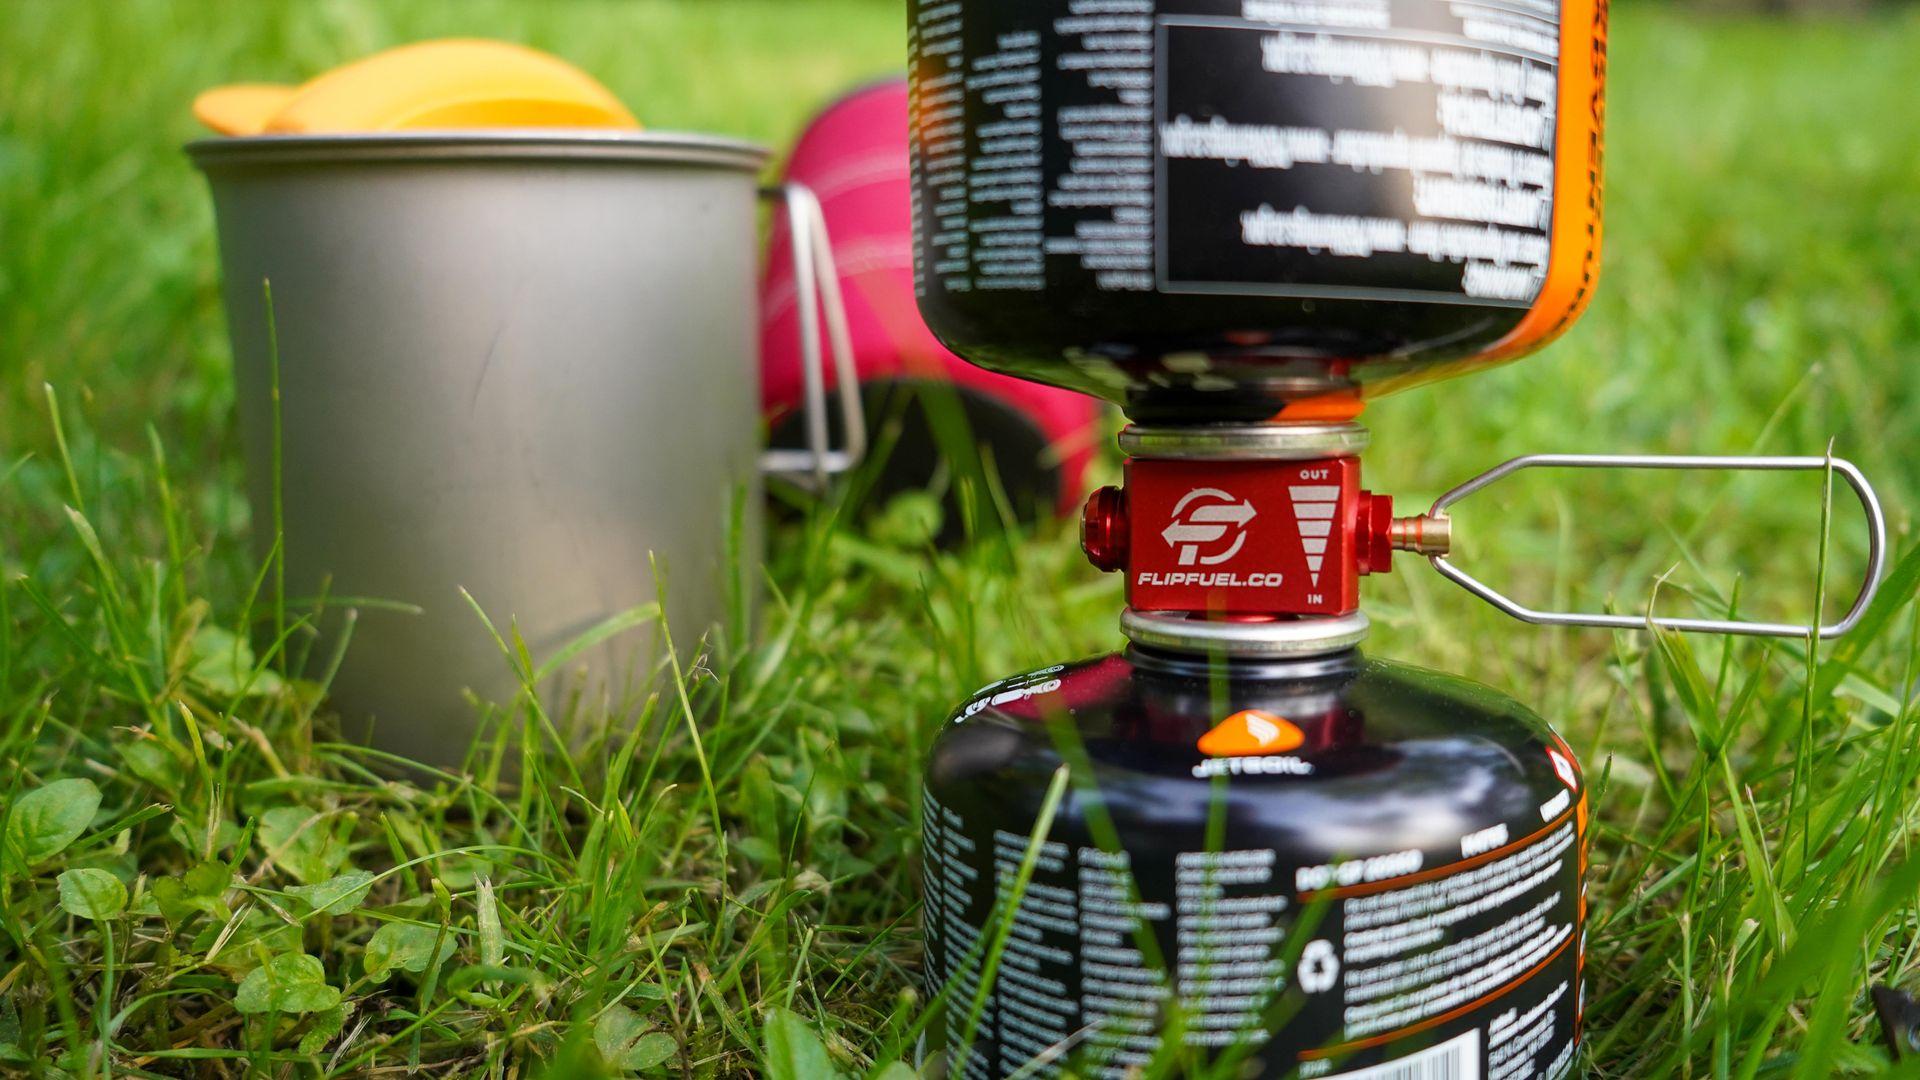
Thread the FlipFuel onto the two canisters. The receiving canister should be on the bottom aligned with the FlipFuel “In” side. The sending canister should be on the top and aligned with the FlipFuel “Out” side.
When the two canisters are attached, twist the valve on the FlipFuel to transfer the fuel. Fuel will flow between the two canisters and into the receiving end. Give the fuel a couple minutes to move, you may not be able to tell from the outside.
When finished, close the valve and then dethread the two fuel canisters apart from each other. You’re ready for your backpacking trip!
Things To Be Aware Of
It's recommended to weigh each fuel canister before and after the fuel transfer. This will help ensure that you do not overfill your receiving can. There shouldn’t be any risk of danger, but it might make the can perform differently when in use.
How do you weigh your canisters? There are two main methods: water float (possible to complete during trip) and digital scale (most accurate and best prior to leaving for your trip)
Also be sure to check your local regulations regarding the transportation of a refilled fuel container.
Final Thoughts
The fuel transfer works and is so easy to use!
The FlipFuel is an amazing device if you’re someone who is always using part of a fuel canister. With a FlipFuel, you’ll save money on fuel and not be as wasteful during your camping trips. With the affordable price, it’s a no brainer to make this your next backpacking gadget.
Other Gear I love for Backpacking:
- A JetBoil for cooking! I have the MiniMo Cooking System.
- I carry the REI Flash 55 Backpack. It has lots of outer pockets, a roll top and a ventilated back panel.
- The AirRail self-inflating sleeping pad.
- The Kelty two person backpacking tent. Without the rain fly, the tent is mesh so you can enjoy the stars.
- The Sea to Summit premium pillow that is light and comfortable.
- The Adventure Medical Kit First Aid Kits.
- The Petzl Tikka Headlamps with rechargeable batteries.
- The Kula Cloth for your women’s peeing needs.
- Trekking Poles. I love Black Diamond foldable Z-poles.
Tips for Getting Started Backpacking:
- Try on the backpack in a store before buying.
- Go on a short hike with your backpack before taking it on the longer backpacking trip.
- Start on shorter trips and discover what gear you really need and don’t need. It’s all about trial and error and working your way up to longer adventures.
- Pack as light as you can, but don’t forget the 10 essentials.
Thanks for Reading!


Let's stay in touch!
Join the Lost with Lydia email list to get monthly travel guides and tips!